It’s been rather busy in my little world lately. With work demanding a lot of my time and what little free time there is getting gulped up by convention work and looking for a house to buy, I’ve been lucky to get a little crocheting in every once in a while. Ok, that’s not completely true, I have been able to get quite a few things done, but to be honest, I should be spending my time on all those other things ^_~
Sadly, I didn’t get to blog a lot (as I’m sure you’ve all noticed) This, however, was mostly due to me not having a lot to say. I have been keeping up the FaceBook with little updates though ^_^
But now, I finally found the time to type out the pattern for one of my latest finished projects: the big version of Saber’s Lion Plush! Some of you may remember the small version I posted a while back and now, her/his big brother/sister is done! The story behind this is that a friend of mine asked if I could make her a ‘life-sized’ version and a small one, both for herself (she cosplays a lot) and her Dolfie Dream Doll (please don’t ask me what that is, I’m not sure either >_<) There was really nothing I could say but “Challenge Accepted!”
And a challenge it turned out to be! First off, it was rather difficult to get some good quality images of the plush shown in the series. Then I had to figure out whether it was a lion, a teddy bear, or a mixture of both (it was the first combined with the last, I guess). And finally I had to figure out a way to get the colour changes right and certain shapes of body parts (the muzzle 0_O) But I think I managed rather well:
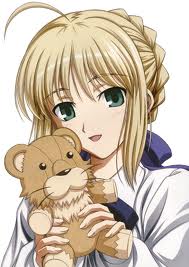
A little reminder of how the plush looks in the anime

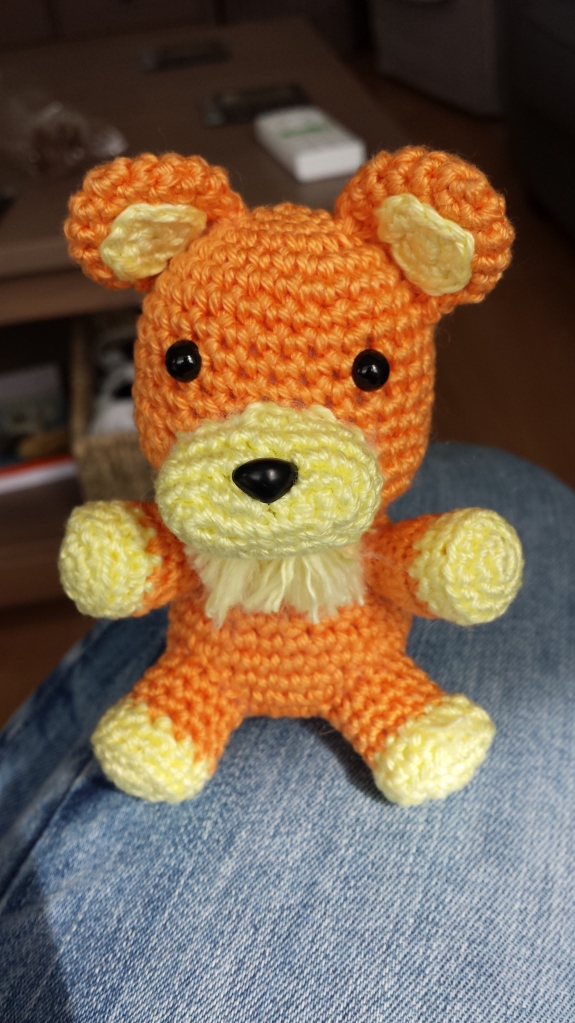
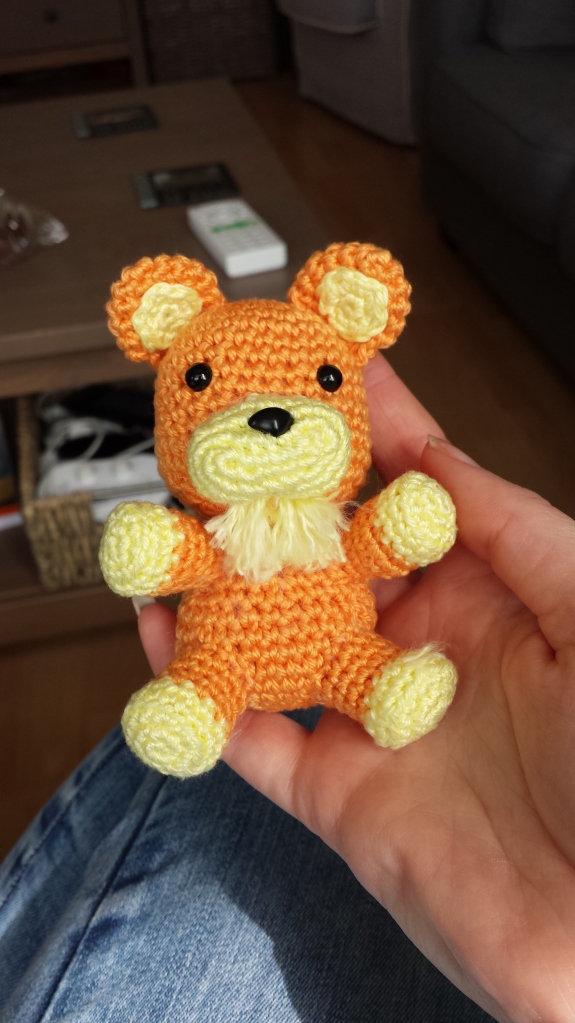
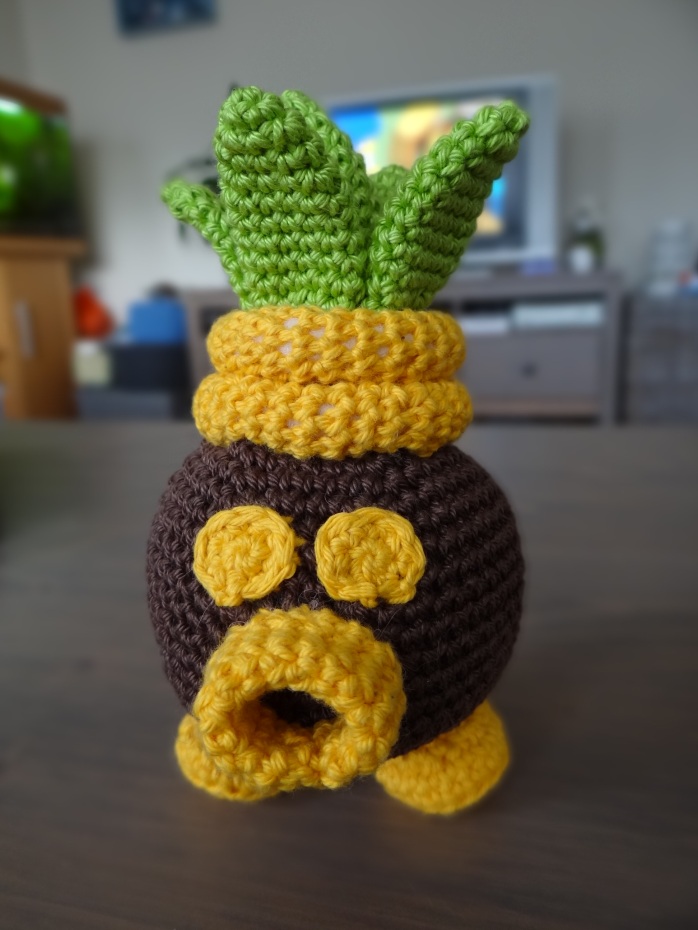
The result!
As for the pattern. I wouldn’t recommend it if you’re just starting to crochet, mostly because of the many colour changes in the legs and arms. And a little bit because of shaping the muzzle. Other than that it uses mainly single crochet stitches, so stitch wise it isn’t very difficult. I hope you all enjoy this pattern and as usual: if you notice anything off or get stuck working with it, feel free to contact me through here or via email (can be found in my profile)
Fate/Stay Night Saber Lion Plush pattern Big version
Materials
– Light brown and beige yarn of your choosing, but be sure to use a light weight yarn, because if it is too thick and heavy, your end result will be bigger!
– Crochet hook that matches your yarn (I used a 3mm hook)
– A pair of safety eyes (I used 15mm)
– One safety nose (I used 15mm, but bigger would have been better)
– Stuffing (loads of it!)
– Needle with an eye big enough to pull the yarn through.
Abbreviations
ch – chain
ss – slip stitch
sc – single crochet
dc – double crochet
inc – increase
dec – decrease
st – stitch
BLO – back loops only
fo – finish off
repeat – repeat what is in between **
(x) – x is the amount of stitches you should have at the end of the round
Pattern
Head
With light brown yarn.
Start with a magic ring or chain 2 and work the first round in the second chain from the hook
R1: sc6 (6)
R2: inc around (12)
R3: *sc1, inc* repeat 6 times (18)
R4: *sc2, inc* repeat 6 times (24)
R5: *sc3, inc* repeat 6 times (30)
R6: *sc4, inc* repeat 6 times (36)
R7: *sc5, inc* repeat 6 times (42)
R8: *sc6, inc* repeat 6 times (48)
R9: *sc7, inc* repeat 6 times (54)
R10: *sc8, inc* repeat 6 times (60)
R11: *sc9, inc* repeat 6 times (66)
R12: *sc10, inc* repeat 6 times (72)
R13: *sc11, inc* repeat 6 times (78)
R14: *sc12, inc* repeat 6 times (84)
R15: *sc13, inc* repeat 6 times (90)
R16-35 (20 rounds): sc1 around (90)
R36: *sc14, inc* repeat 6 times (96)
R37: *sc15, inc* repeat 6 times (102)
R38: *sc16, inc* repeat 6 times (108)
R39-41 (3 rounds): sc1 round (108)
R42: *sc16, dec* repeat 6 times (102)
R43: *sc15, dec* repeat 6 times (96)
R44: *sc14, dec* repeat 6 times (90)
R45: *sc13, dec* repeat 6 times (84)
R46: *sc12, dec* repeat 6 times (78)
R47: *sc11, dec* repeat 6 times (72)
R48: *sc10, dec* repeat 6 times (66)
R49: *sc9, dec* repeat 6 times (60)
R50: *sc8, dec* repeat 6 times (54)
R51: *sc7, dec* repeat 6 times (48)
R52: *sc6, dec* repeat 6 times (42)
R53: *sc5, dec* repeat 6 times (36)
Start stuffing at this point and attach the safety eyes between rounds 25 and 26 with about 12 stitches between them.
R54: *sc4, dec* repeat 6 times (30)
R55: *sc3, dec* repeat 6 times (24)
R56: *sc2, dec* repeat 6 times (18)
R57: *sc1, dec* repeat 6 times (12)
R58: dec around (6)
FO and weave in the end.
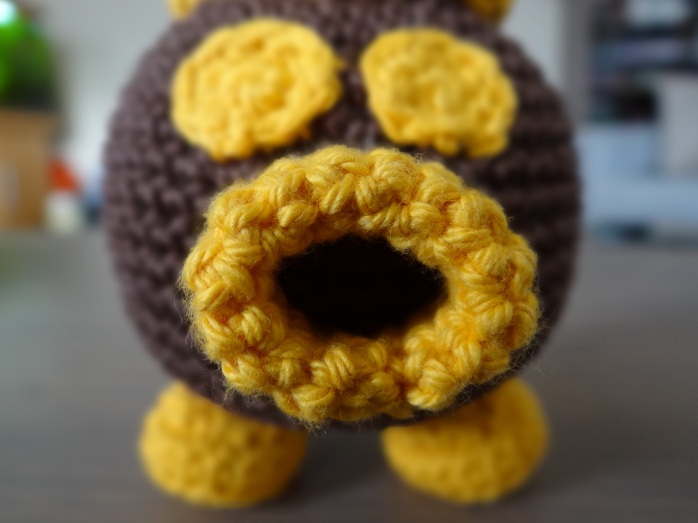
Muzzle
With beige yarn.
Ch16 and start from the second chain from the hook
R1: sc14, inc and continue on the other side of the chain, sc14, inc (32)
R2: *sc7, inc* repeat 4 times (36)
R3: *sc5, inc* repeat 6 times (42)
R4: *sc6, inc* repeat 6 times (48)
R5: *sc7, inc* repeat 6 times (54)
R6: *inc3, sc21, inc3* repeat 1 times (66)
R7: *sc1, inc* repeat 3 times, sc21, *sc1, inc* repeat 6 times, sc21, *sc1, inc* repeat 3 times (78)
R8-11 (4 rounds): sc1 around (78)
R12: *sc11, dec* repeat 6 times (72)
R13: *sc10, dec* repeat 6 times (66)
R14: *sc9, dec* repeat 6 times (60)
R15: *sc8, dec* repeat 6 times (54)
R16: *sc7, dec* repeat 6 times (48)
R17: *sc6, dec* repeat 6 times (42)
R18: *sc5, dec* repeat 6 times (36)
R19: *sc4, dec* repeat 6 times (30)
FO and leave a long tail to sew the muzzle to the head. Attach between rounds 32 and 46. Take a bit of beige yarn, thread it through the first round of the muzzle and the underside and pull it tight. This way, you get the shape a bit better.
Nose
With light brown yarn.
Work this one in rows!
Row1: ch11, turn
Row2: start in the second chain from the hook, sc10, ch1, turn (10)
Row3-9 (7 rounds): sc10, ch1, turn (10)
Row10: dec, sc6, dec, ch1, turn (8)
Row11: dec, sc4, dec, ch1, turn (6)
Row12: dec, sc2, dec, ch1, turn (4)
Row13: sc1 around (about 34)
FO and leave a long tail. Sew the smaller part to the muzzle first, then position the nose in the middle. After the nose is secure, you can sew the rest of the piece to the muzzle and the head, leading up a little bit from the muzzle. Stuff very lightly as you go along.

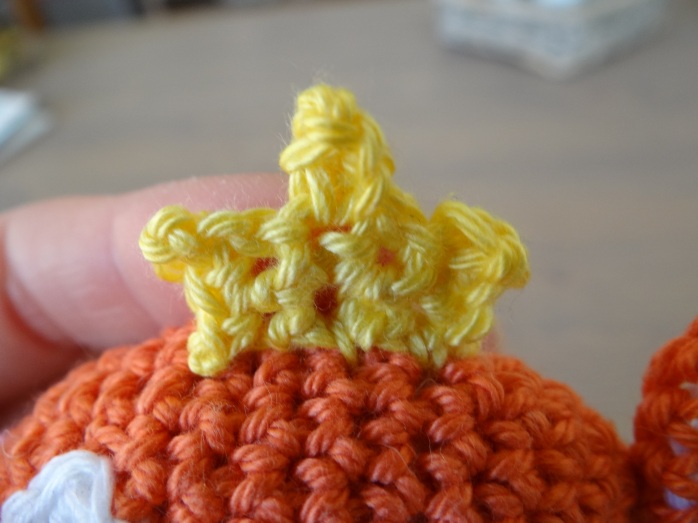
Muzzle detail
Ears (make 2)
With light brown yarn.
Start with a magic ring or chain 2 and work the first round in the second chain from the hook
R1: sc6 (6)
R2: inc around (12)
R3: *sc1, inc* repeat 6 times (18)
R4: *sc2, inc* repeat 6 times (24)
R5: *sc3, inc* repeat 6 times (30)
R6: *sc4, inc* repeat 6 times (36)
R7-12 (6 rounds): sc1 around (36)
R13: *sc4, dec* repeat 6 times (30)
R14: sc1 around (30)
FO and leave a long tail.
Inner Ears (make 2)
With beige yarn.Work this one in rows!
Row1: ch4, dc 5 in 4th chain from the hook (3 of the chains count as the first dc) (6)
Row2: ch3, turn, dc1 in first st, dc inc in next 5 st (12)
Row3: ch3, turn, dc1 in first st, dc1, *dc inc, dc1* repeat 5 times (18)
FO and leave a tail to sew onto the ears.
After sewing on the inner ears, slightly stuff the ears and sew them shut with a whip-stitch, then sew them onto the head.
Body
With light brown yarn.
Start with a magic ring or chain 2 and work the first round in the second chain from the hook
R1: sc6 (6)
R2: inc around (12)
R3: *sc1, inc* repeat 6 times (18)
R4: *sc2, inc* repeat 6 times (24)
R5: *sc3, inc* repeat 6 times (30)
R6: *sc4, inc* repeat 6 times (36)
R7: *sc5, inc* repeat 6 times (42)
R8: *sc6, inc* repeat 6 times (48)
R9: *sc7, inc* repeat 6 times (54)
R10: *sc8, inc* repeat 6 times (60)
R11: *sc9, inc* repeat 6 times (66)
R12: *sc10, inc* repeat 6 times (72)
R13: *sc11, inc* repeat 6 times (78)
R14: *sc12, inc* repeat 6 times (84)
R15: *sc13, inc* repeat 6 times (90)
R16: *sc14, inc* repeat 6 times (96)
R17-26 (10 rounds): sc1 around (96)
R27: *sc14, dec* repeat 6 times (90)
R28-30 (3 rounds): sc1 around (90)
R31: *sc13, dec* repeat 6 times (84)
R32-34 (3 rounds): sc1 around (84)
R35: *sc12, dec* repeat 6 times (78)
R36-38 (3 rounds): sc1 around (78)
R39: *sc11, dec* repeat 6 times (72)
R40-41 (2 rounds): sc1 around (72)
R42: *sc10, dec* repeat 6 times (66)
R43-44 (2 rounds): sc1 around (66)
R45: *sc9, dec* repeat 6 times (60)
R46-47 (2 rounds): sc1 around (60)
R48: *sc8, dec* repeat 6 times (54)
R49-50 (2 rounds): sc1 around (54)
R51: *sc7, dec* repeat 6 times (48)
FO and leave a long tail. Stuff and sew the body to the head.
Legs (make 2)
Begin with beige yarn.
Start with a magic ring or chain 2 and work the first round in the second chain from the hook
R1: sc6 (6)
R2: inc around (12)
R3: *sc1, inc* repeat 6 times (18)
R4: *sc2, inc* repeat 6 times (24)
R5: *sc3, inc* repeat 6 times (30)
R6: *sc4, inc* repeat 6 times (36)
R7: *sc5, inc* repeat 6 times (42)
R8: *sc6, inc* repeat 6 times (48)
R9: BLO sc1 around (48)
R10-13 (4 rounds): sc1 around (48)
This is where things get tricky
R14: *sc5, change to light brown yarn, sc1, change to beige yarn* repeat 8 times (48)
R15: *sc4, change to light brown yarn, sc2, change to beige yarn* repeat 8 times (48)
R16: *sc3, change to light brown yarn, sc3, change to beige yarn* repeat 8 times (48)
R17: *sc2, change to light brown yarn, sc4, change to beige yarn* repeat 8 times (48)
R18: *sc1, change to light brown yarn, sc5, change to beige yarn* repeat 8 times (48)
Make sure you change to light brown yarn in the stitch before the light brown stitches of the previous round and back to beige yarn in the stitch after the light brown stitches of the previous round. This way, you get the pointed colour changes. At the end of round 18, don’t change back to beige yarn, but continue the rest of the leg with light brown.
R19-24 (5 rounds): sc1 around (48)
R25: *sc6, dec* repeat 6 times (42)
R26-27 (2 rounds): sc1 around (42)
R28: *sc5, dec* repeat 6 times (36)
FO, leave a tail. Stuff the leg and sew to the body between rounds 8 and 24.
Arms (make 2)
Begin with beige yarn.
Start with a magic ring or chain 2 and work the first round in the second chain from the hook
R1: sc6 (6)
R2: inc around (12)
R3: *sc1, inc* repeat 6 times (18)
R4: *sc2, inc* repeat 6 times (24)
R5: *sc3, inc* repeat 6 times (30)
R6: *sc4, inc* repeat 6 times (36)
R7: *sc5, inc* repeat 6 times (42)
R8: *sc6, inc* repeat 6 times (48)
R9: BLO sc1 around (48)
R10-13 (4 rounds): sc1 around (48)
This is where things get tricky
R14: *sc5, change to light brown yarn, sc1, change to beige yarn* repeat 8 times (48)
R15: *sc4, change to light brown yarn, sc2, change to beige yarn* repeat 8 times (48)
R16: *sc3, change to light brown yarn, sc3, change to beige yarn* repeat 8 times (48)
R17: *sc2, change to light brown yarn, sc4, change to beige yarn* repeat 8 times (48)
R18: *sc1, change to light brown yarn, sc5, change to beige yarn* repeat 8 times (48)
Make sure you change to light brown yarn in the stitch before the light brown stitches of the previous round and back to beige yarn in the stitch after the light brown stitches of the previous round. This way, you get the pointed colour changes. At the end of round 18, don’t change back to beige yarn, but continue the rest of the leg with light brown.
R19: *sc6, dec* repeat 6 times (42)
R20-24 (5 rounds): sc1 around (42)
R25: *sc5, dec* repeat 6 times (36)
R26-30 (5 rounds): sc1 around (36)
FO, leave a tail and stuff the arm. Sew the arms to the body between rounds 37 and 49.

Detail of the colour changes in the arm (the legs are the same)
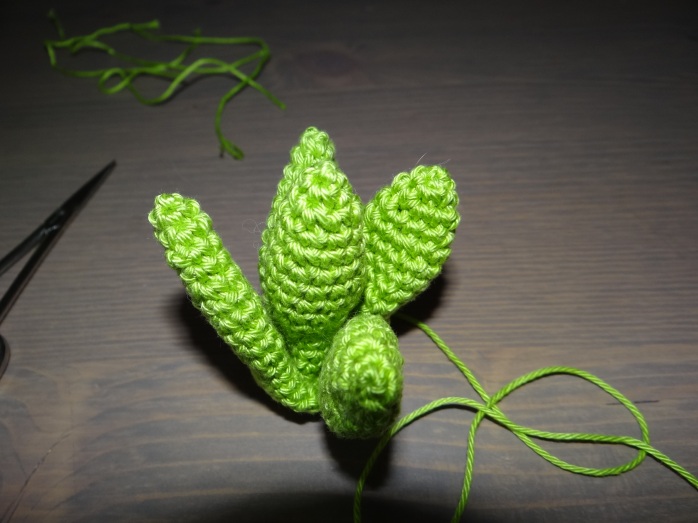
Ruffle Part 1
With beige yarn.
Work this part in rows!
Ch21 and start working in the second chain from the hook
Row1: sc20, ch1, turn (20)
Row2-3 (2 rounds): sc20, ch1, turn (20)
Row4: *sc7, ch1, turn, dec, sc5, ch1, turn, dec, sc4, ch1, turn, dec, sc3, ch1, turn, dec, sc2, ch1, turn, dec, ch1 but don’t turn, sc down the side until you reach row3* (this makes the first spike in the ruffle). sc6, ch1 turn, dec, sc4, ch1, turn, dec, sc3, ch1, turn, dec, sc2, ch1, turn, dec, sc1, ch1, turn, dec, ch1, turn, sc down the side until you reach row3 (this makes the second spike) repeat ** 1 time.
Sc around until you reach the end of row4. FO and leave a tail to sew the ruffle to the body, just below the head and in between the arms.
Ruffle Part 2
With beige yarn.
Work this part in rows!
Ch26 and start working in the second chain from the hook
Row1: sc25, ch1, turn (25)
Row2: sc25, ch1, turn (25)
Row3: *sc6, ch1, turn, dec, sc4, ch1, turn, dec, sc3, ch1, turn, dec, sc2, ch1, turn, dec, sc1, ch1, turn, dec, ch1, turn sc down the side until you reach row2* repeat 4 times.
Now you have 4 spikes on this ruffle. Sc all around until you reach the end of row3. FO and leave a tail to sew the ruffle to the head, just above the body.
Tail
With light brown yarn.Start with a magic ring or chain 2 and work the first round in the second chain from the hook
R1: sc6 (6)
R2: *sc1, inc* repeat 3 times (9)
R3: *sc2, inc* repeat 3 times (12)
R4: *sc3, inc* repeat 3 times (15)
R5: *sc4, inc* repeat 3 times (18)
R7: *sc5, inc* repeat 3 times (21)
R8: *sc6, inc* repeat 3 times (24)
R9: sc1 around (24)
R10: *sc3, inc* repeat 6 times (30)
R11: sc1 around (30)
R12: *sc4, inc* repeat 6 times (36)
R13-15 (3 rounds): sc1 around (36)
R16: *sc4, dec* repeat 6 times (30)
R17: *sc3, dec* repeat 6 times (24)
R18: *sc2, dec* repeat 6 times (18)
Stuff this part and continue stuffing the tail lightly as you go along.
R19: *sc1, dec* repeat 6 times (12)
R20: *sc3, inc* repeat 3 times (15)
R21-50 (30 rounds): sc1 around (15)
FO and leave an end of yarn to sew the tail to the body between rounds 16 and 23.
And that should do it: one Lion Plush for you to cuddle and enjoy ^_^

Side view

Family portrait
Please, do not sell or post this pattern as your own. You’re welcome to use it, but please link back and give credit to this site ^_^
Note that Fate/Stay Night is copyrighted by Type-Moon. I am not the original creator of the character, but I am of this pattern.
Cheers, Lydia


 I’m off to enjoy our lovely spring weather!


 I promised you guys I’d share the pattern soonish, so here it is ^_^
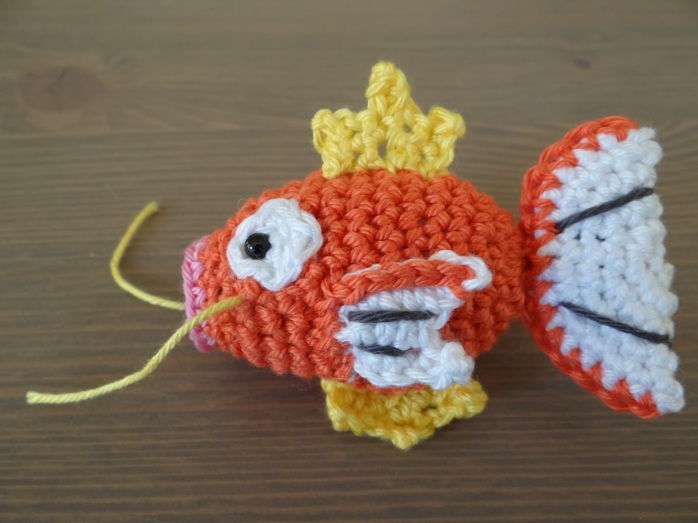
 Tail
Tail